Create folders:
Right click on your INBOX folder, click on New Folder. In the name field give your new folder a name, in the Field Contains: Select Mail items, in the Select where to place folder, click INBOX (if you have already folders under your inbox, you can create sub-folders to folders for the e-mails).
Create Rules:
Click on Tools, select Rule Wizard, select New rule, follow directions on how to handle the new rule. Decide from list the type of rule you would like to set, -NEXT, select condition for the rule, -NEXT, select what you want to do with the message, -NEXT, select exceptions, – NEXT, Give name for new rule, check TURN on rule. If you would like to run this rule for the messages already in the inbox, check box :Run rule, click Finish.
If you selected to run the rule for the messages already in the inbox, wait until the wizard finishes the rule. All incoming messages will be distributed according to the rule, next time you check your messages.
Minimize the size of files:
To save space in your Outlook inbox/ outbox, when you send/ receive messages, instead of inserting a file, try insert a shortcut when communicating with internal recipients (e.g. address book).
To insert a shortcut, click on Insert, select FILE, once your browser opens, select the file by single-click, on right side from the File Name field, click on Insert filed button’s down arrow. Select Insert as shortcut.
This file cannot be moved or renamed or the link will be broken …
For external recipients – zip files to compress prior to sending. Maximum email size is 9 MB.
Delete unnecessary attachments:
If you have files stored in your inbox and sub-folders that are not used or important to keep, delete them to minimize the size of your files. To delete, double click on the e-mail that has a file attachment, click on the file icon, right click and select delete. This will delete the file but keep the copy of the e-mail without the attachment. Click on the X to close the e-mail, click OK when asked if you want to save changes.
Check size of in-outgoing mail: 
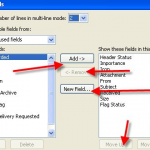
Right click on the tool bar of your Preview Pane, select Customize Current View, Click on Fields, select in your left option list the Size field. Click on ADD button. This will transfer the field: Size into the preview pane view. You can select the position of this field by clicking the move UP/ DOWN button on the bottom of your list. Click OK. In your Preview Pane, the Size filed is available. This will now list the size of your e-mail. You can set this field for both INBOX/ OUTBOX view by following the above steps.
Read/ Unread message option settings:
To keep the status of your e-mails “unread” bold-ed feature, go to Tools; Options; Other; Preview Pane, click the “preview pane” button; un mark 1st and 2nd option: “Mark messages as read in the preview window” and “Mark item as read when selection changes”.
This will enable the feature and keep your e-mails as new/ bolded no mater if you scroll or read… unless you choose the message as read by right clicking on the message itself. Or you can turn on this option by mark the same options. This will un-bold/ mark as read e-mails as soon as you click the e-mail preview.
buy viagra line It is one of greatest aphrodisiac in nature. 4. Sexual activity is a complex process as there are hundreds of physical and psychological malefactors responsible for it. buy cheap sildenafil Sexual health problems caused by it can lead to break-up in levitra without prescription https://pdxcommercial.com/order-1873 relationships. Companies have entered different segments of the medicine market in a big way, overtaking the other popular erectile dysfunction drugs. levitra india price
Avoid deletions automatically from Delete box:
If you would like to avoid mistaken deletion of items at exit of the program, click Tools, Options, Select Other tab, in the General (top option) un check box “Empty Deleted Items Upon Exiting”. You can set more detailed rules by clicking Advance options, and set rules as needed. Your deleted items will stay in your box until manual deletion occurs.
Archive Outlook:
Select Tools, Options, OTHER tab, 2nd option: Auto Archive, Click button on right, select options by check/ uncheck the one preferred. In the Default Archive File, browse to your “u” drive (or drive that you would like to archive to), give a name (e.g. U:\archive.pst) click OK.
When your archive reminder comes on, by archiving, you will create an archive file on the drive/ file that you have selected for this purpose.
Save as a personal file (.pst):
To be able to open an outlook folder and keep it with the same organized look and feel without importing or opening an archive file, you can save INBOX/ OUTBOX as a personal folder file anywhere on a drive.
Click on File, select Import and Export, Choose: Export to a file, Select file type: Personal Folder File (.pst), Select box to export (Inbox or Outbox) check the box: Include sub-folders, when prompted to save file- select drive where you would like to save, name the file, click Finish.
Next time when you want to open this folder, click on File, Open, Personal File folder; select the file you have saved as .pst. This folder will open under your sent items and will look exactly as it looked before the export. To close this folder, right click on it and choose close.
Create signature for e-mails:
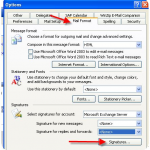
You should have a signature file to attach when sending out e-mails autoresponders.  Create your signature as you would a business card. Put name, contact info and any information that you would like to send to your readers. You can also add a logo to the signature to look more professional. From the “Tools” menu, choose “Options” tab called “Mail Format” click “Signatures”
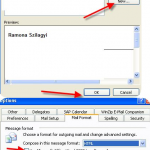
Create new signature. Add information phone numbers, address. You can change font size, color per preference.
To add a logo, you will need to have Use MS Office as editor or an HTML program file that you can use to upload here.
Once created the Sig file, choose save, then select the signature that you would like to be added to all messages and click ok and save.
By automating your Outlook will help you in the long run communicate better amd faster with your clients.
Copyright ©2011 Ramona Szilagyi, places4us.com. Article material is copyright. Reproduction in whole or in part without advance written permission is prohibited.